Showing posts with label diy. Show all posts

Friday, 11 September 2015

The Playhouse is Complete!


School has started and so hopefully I will be able to get more into the groove of blogging again. Man, distractions come in many shapes and sizes. And while most of the distractions have been my family, which is a good thing to be distracted by, it sure makes it hard to carve out time for me and my thoughts. Hopefully that time will begin again soon. Although, we just started potty training Miss P and that definitely has the foreground in my thoughts at the moment!

Well we did it. We completed a project!!! We are really good project starters. When it comes to completing the project on the time schedule that I want... not so good at. But we did it. This awesome playhouse was finished before the end of summer and that is a big win in my books.


So to recap the whole idea for this particular playhouse came from the blog vintage revivals. She has really great blueprints and instructions for the frame. (note previous post) But we did have to tweak the finishes. While she used a painters canvas for the roof and walls to give it a cool tenty feel I knew that that would not work in our climate. That canvas would get weathered and mouldy and not hold up well after a winter. So my husband and I went back and forth trying to figure out what the best solution would be. We thought of detachable roofs or just using a tarp and then a light bulb moment. We decided just to use the wavy plastic panels that are used on garden sheds and other structures. Seriously when we came up with it angels were singing up above. For our house we bought four panels and cut them in half. They were the perfect length and width. Seriously, they could not have fit any better. We also re-jigged the ridgepole to be two at angles to accommodate the angle of the roof better. We also put 2x4s at the bottom of the angles so we could attach the roof at the bottom as well.


For the walls we used lattice on all three sides. If we had thought it through we may have put up something in the middle of the long walls to give it support. If the kids push too hard on the walls they could break. But they are fine for now and the girls are really good about being careful with them. We liked using the lattice because it lets in a lot of light. Some play house are so closed off they can be pretty dark. This one is great because the kids can always see, yet it still gives a sense of privacy.

not sure what the fir branch is doing on the side. must be some sort of decoration :)

So it might not be the prettiest or cutesiest playhouse on the block but we love it. It is big enough and tall enough that it should be a nice hangout for years to come. And it was way cheaper than buying those prefabricated ones from the store. I see many tea parties and games being played in this house in the near future. Yay summer projects!

Wednesday, 12 August 2015

Oh the Projects on the Go!

Sorry about the hiatus. We were on a two week road trip vacation.

When we bought our house we knew that we would have a lot of projects to keep us going for a while. And while time is on our side to be able to do things slowly and at a pace we can afford it is hard to be patient. I have so many ideas of how I want different rooms to be that I just want it done now. But that isn't how it is going.

This summer there are two projects that we are tackling. One will be done shortly. The other will be well into the fall and winter.

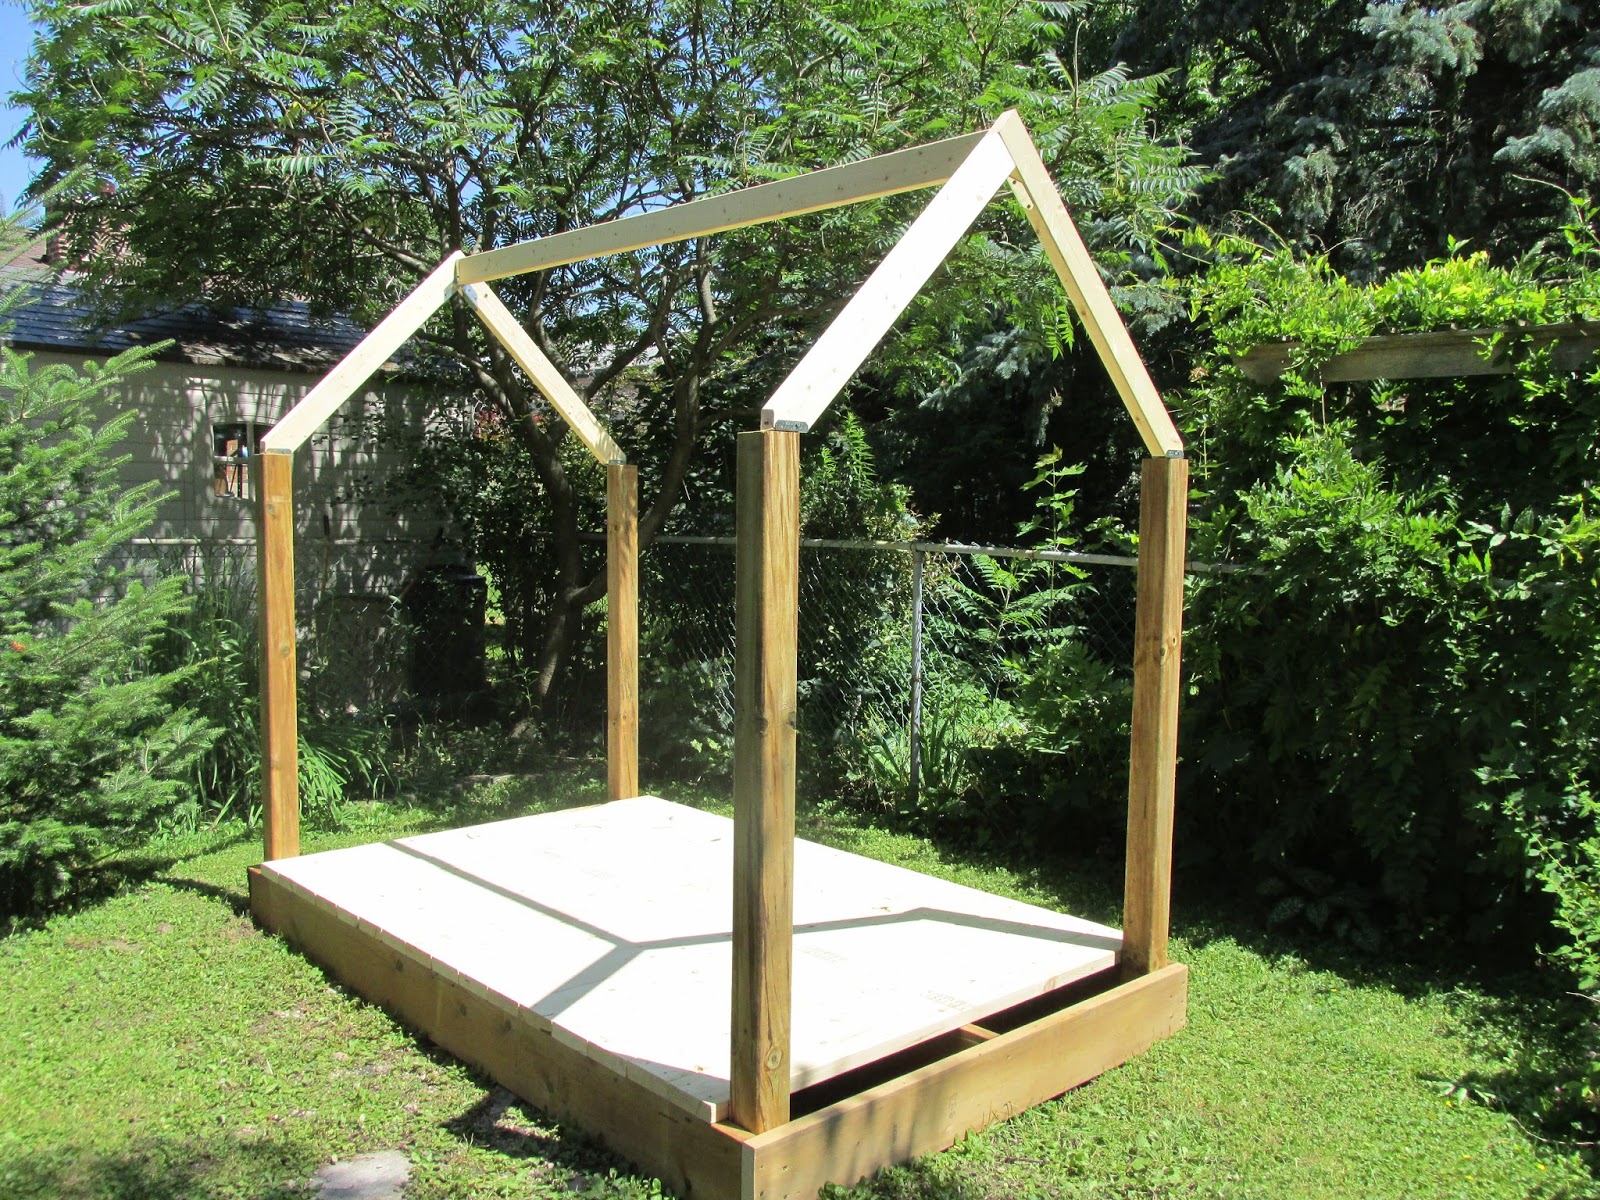
The first is a little playhouse for the girls. Miss V and Miss G have been bugging me all winter about needing a playhouse or a clubhouse or a hangout or whatever you want to call it. Well thanks to pinterest and putting our own touches on it we found one that would fit our budget, did not involve trying to find pallets (they can be harder to find than you think) and will be big enough to fit them for years to come.

We took the blueprints for the main structure from this really cool blog. We had to tweak it slightly because she lives in a dry warm climate where I live in one that is rather wet and has snow to contend with. If you decide to build this kind of framed house yourself just watch the measurements for the roof peaks. We found that the length measurement was a little too short. It was fine enough, but then, we aren't picky. Just something to keep in mind.

This is where we are in it. All we have left to do now is put on the roof and the walls.


Our other project is turning our former, not being used for anything but storing junk, kitchenette into our office/craft area. This means a lot of getting rid of wallpaper and cabinets, fixing walls, figuring out lighting, pulling up flooring, putting down new flooring, deciding on appropriate storage etc. etc. This change came about because Miss V and Miss G decided that they did not want to share a bedroom anymore and that mean that they wanted to sleep in the spare room downstairs that currently holds our office. While their sleeping arrangement needs aren't dictated by them it did give me the kick in the butt I needed to get going on the kitchenette, which really was just a waste of space.

This is our kitchenette before we did anything to it.

the cow print wall paper is actually drawer liner
We have since taken out the cabinetry and sold it . We have also started to remove all of the wall paper which we have been slow at doing. We have also started taking up some of the flooring.

I am excited about having a blank canvas to work with and mould into my vision. Pinterest has given me quite a few ideas and I am excited to take those and make it into something new and mine. I will put up more pictures as the reno continues.

What building/reno projects do you have on the go?