Showing posts with label create. Show all posts

Friday, 11 September 2015

The Playhouse is Complete!


School has started and so hopefully I will be able to get more into the groove of blogging again. Man, distractions come in many shapes and sizes. And while most of the distractions have been my family, which is a good thing to be distracted by, it sure makes it hard to carve out time for me and my thoughts. Hopefully that time will begin again soon. Although, we just started potty training Miss P and that definitely has the foreground in my thoughts at the moment!

Well we did it. We completed a project!!! We are really good project starters. When it comes to completing the project on the time schedule that I want... not so good at. But we did it. This awesome playhouse was finished before the end of summer and that is a big win in my books.


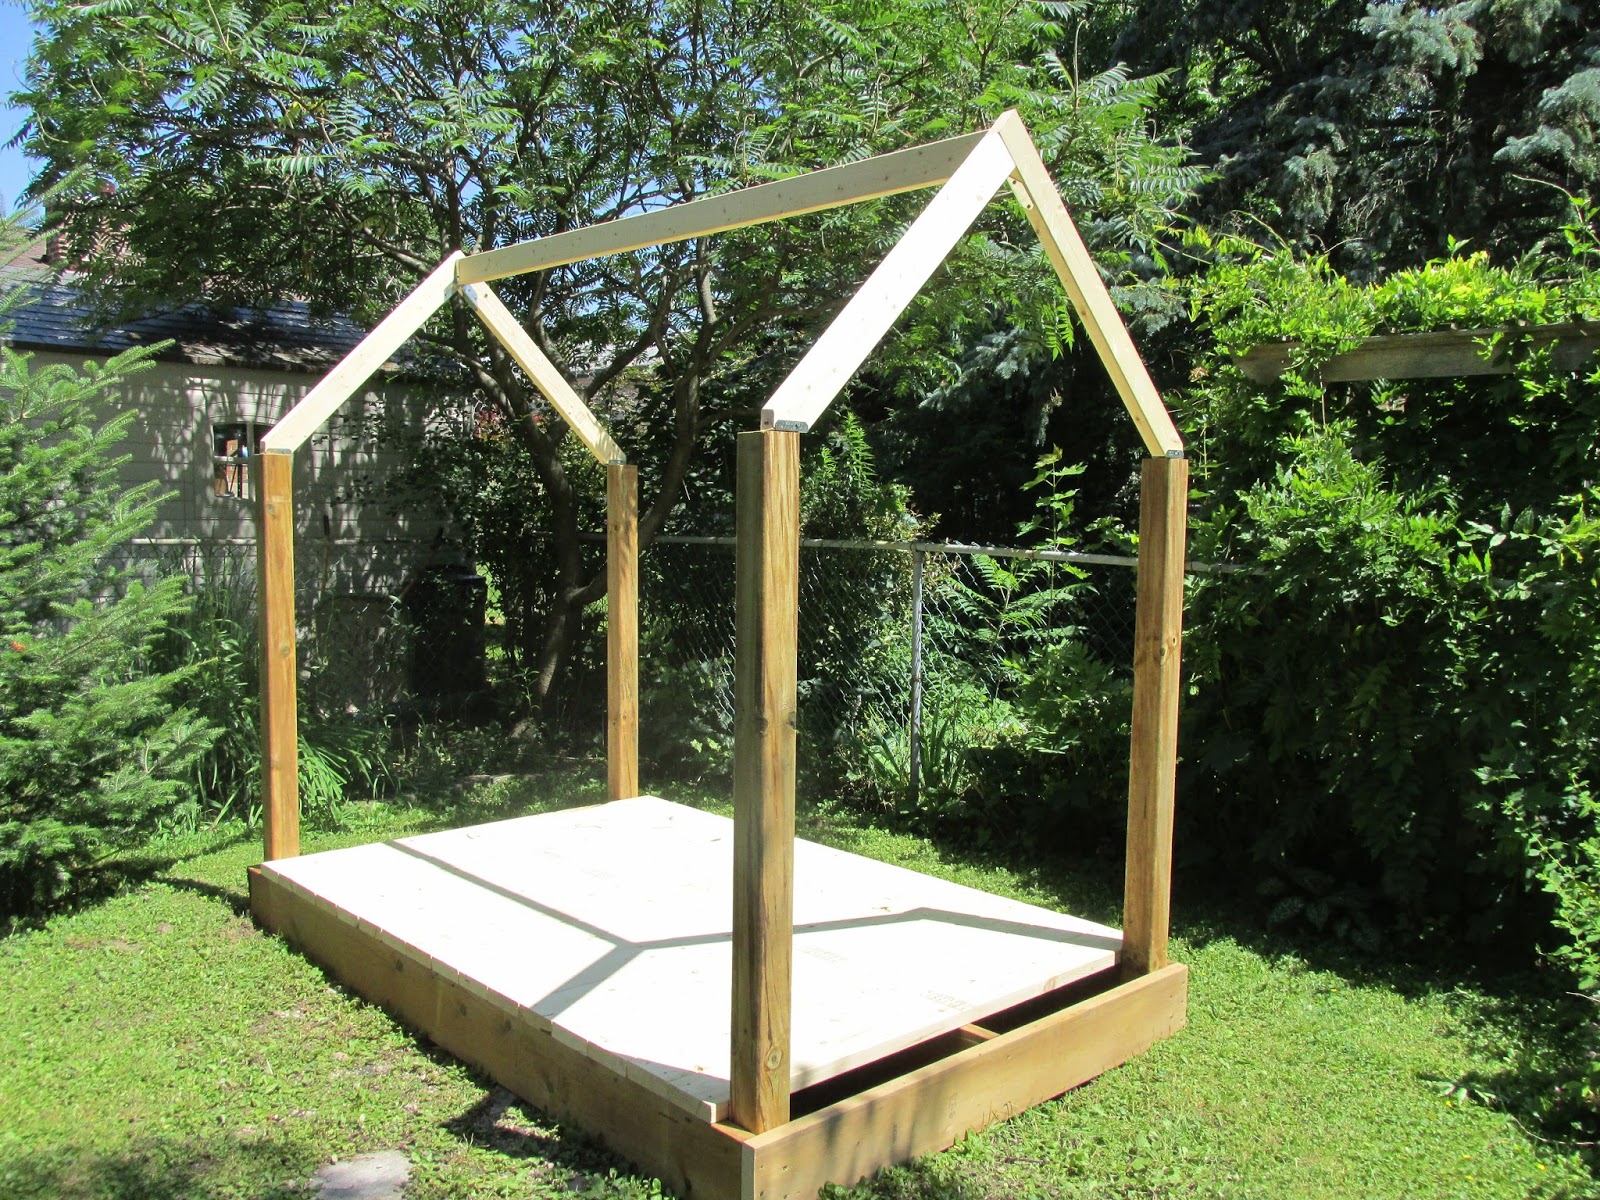
So to recap the whole idea for this particular playhouse came from the blog vintage revivals. She has really great blueprints and instructions for the frame. (note previous post) But we did have to tweak the finishes. While she used a painters canvas for the roof and walls to give it a cool tenty feel I knew that that would not work in our climate. That canvas would get weathered and mouldy and not hold up well after a winter. So my husband and I went back and forth trying to figure out what the best solution would be. We thought of detachable roofs or just using a tarp and then a light bulb moment. We decided just to use the wavy plastic panels that are used on garden sheds and other structures. Seriously when we came up with it angels were singing up above. For our house we bought four panels and cut them in half. They were the perfect length and width. Seriously, they could not have fit any better. We also re-jigged the ridgepole to be two at angles to accommodate the angle of the roof better. We also put 2x4s at the bottom of the angles so we could attach the roof at the bottom as well.


For the walls we used lattice on all three sides. If we had thought it through we may have put up something in the middle of the long walls to give it support. If the kids push too hard on the walls they could break. But they are fine for now and the girls are really good about being careful with them. We liked using the lattice because it lets in a lot of light. Some play house are so closed off they can be pretty dark. This one is great because the kids can always see, yet it still gives a sense of privacy.

not sure what the fir branch is doing on the side. must be some sort of decoration :)

So it might not be the prettiest or cutesiest playhouse on the block but we love it. It is big enough and tall enough that it should be a nice hangout for years to come. And it was way cheaper than buying those prefabricated ones from the store. I see many tea parties and games being played in this house in the near future. Yay summer projects!

Wednesday, 12 August 2015

Oh the Projects on the Go!

Sorry about the hiatus. We were on a two week road trip vacation.

When we bought our house we knew that we would have a lot of projects to keep us going for a while. And while time is on our side to be able to do things slowly and at a pace we can afford it is hard to be patient. I have so many ideas of how I want different rooms to be that I just want it done now. But that isn't how it is going.

This summer there are two projects that we are tackling. One will be done shortly. The other will be well into the fall and winter.

The first is a little playhouse for the girls. Miss V and Miss G have been bugging me all winter about needing a playhouse or a clubhouse or a hangout or whatever you want to call it. Well thanks to pinterest and putting our own touches on it we found one that would fit our budget, did not involve trying to find pallets (they can be harder to find than you think) and will be big enough to fit them for years to come.

We took the blueprints for the main structure from this really cool blog. We had to tweak it slightly because she lives in a dry warm climate where I live in one that is rather wet and has snow to contend with. If you decide to build this kind of framed house yourself just watch the measurements for the roof peaks. We found that the length measurement was a little too short. It was fine enough, but then, we aren't picky. Just something to keep in mind.

This is where we are in it. All we have left to do now is put on the roof and the walls.


Our other project is turning our former, not being used for anything but storing junk, kitchenette into our office/craft area. This means a lot of getting rid of wallpaper and cabinets, fixing walls, figuring out lighting, pulling up flooring, putting down new flooring, deciding on appropriate storage etc. etc. This change came about because Miss V and Miss G decided that they did not want to share a bedroom anymore and that mean that they wanted to sleep in the spare room downstairs that currently holds our office. While their sleeping arrangement needs aren't dictated by them it did give me the kick in the butt I needed to get going on the kitchenette, which really was just a waste of space.

This is our kitchenette before we did anything to it.

the cow print wall paper is actually drawer liner
We have since taken out the cabinetry and sold it . We have also started to remove all of the wall paper which we have been slow at doing. We have also started taking up some of the flooring.

I am excited about having a blank canvas to work with and mould into my vision. Pinterest has given me quite a few ideas and I am excited to take those and make it into something new and mine. I will put up more pictures as the reno continues.

What building/reno projects do you have on the go?

Friday, 10 April 2015

Homemade Paint - for kids

This week has been a sick week here. Poor Miss G. She has had such a runny nose. It has now moved on to a cough. Poor girl. Hopefully this is the end to the sickness for this winter season and we will have nothing but health from now on.

Since Miss G. has been home from school she decided this would be the best time to do experiments. And why not? The schools science fair is coming up so this was the perfect opportunity to do her science fair project. She was looking at how well certain items absorb water.

I showed her how water absorption worked and what happens when things get over saturated. Here is a link to a great experiment to do with the kids. With the water left over from that experiment Miss G decided she was going to add a bunch of different things to see if she could make paint. I think she was on the right track but had the proportions out of wack. Well today we remedied that. Here is how to make homemade paint.


1 cup salt
1 cup flour
1 1/3 cup water
food colouring of your choice.

This makes four generous sized amounts of paint. For more colours either make more or have smaller amounts.

I found this recipe in the description of this youtube video. Thanks youtube! Have fun painting!


Monday, 29 December 2014

My Christmas Crafting Gifts

Well Merry after Christmas to you all! Was your Christmas exciting and relaxing and everything you wanted? I had a nice quiet Christmas. Once the girls had unwrapped their presents they basically disappeared for the rest of the day playing nicely with each other. They only surfaced when they were hungry, which, is pretty typical.

This mean I could relax and do my logic puzzle book in relative peace. With my favourite fourth child (aka my dishwasher) we were able to keep on top of the dishes and kept the counters and sink looking as sparse as can be.

This year we tried to keep toys to a minimum, as they all ready have a gazillion, and those gazillion drive me crazy. This mean a bit of crafting on my part. There was one Christmas project I didn't even get started, but I figure, I will save that for their birthdays!

This is one of the crafty presents I made. I got the idea from this blog.

I found these canvas letters at Michael's and then hot glued a layer of white/cream buttons down.


I then decorated them with colourful buttons, usually trying to hide any gaps the white ones might have left. It was fun making them. And I have never been so grateful for a glue gun before in my life. Those things are miracle workers and they rock!

I got the idea for the next gift from this blog and I got the pattern for the bag from this blog.

I meant to put this fort kit together for my own kids, but ran out of time and energy. This is the one that I sent to my brother in-laws family. When I am done with the holidays I will put one together for my own as well.

This fort kit is genius. There are always cushions missing and chairs being taken from the dining room, all in the effort of building the ultimate fort. The kids seem to always be asking me for blankets and moving them all over the house. It can be a little frustrating. While I don't want to burst their creative bubble, I don't always want my dining room chairs and my bedroom comforter used as their forts. In comes the fort kit. It has everything you could want or need in one convenient bag. They have dedicated sheets, ropes etc. to make the best fort ever, and best of all, my comforter stays where it belongs, on my bed!

I didn't bother adding the tabs to the sheets, as suggested in the patterns blog. I think it will work out with out them.

I hope you enjoy this next week of festivities! Have a very Happy New Year! See you in 2015

Thursday, 26 June 2014

Strawberry Jam

This past Saturday I had the most productive Saturday ever. It was amazing how things just seemed to work out that my family and I were able to accomplish what we set out do do. We went to the farmers market, took things to donate at the secondhand store and even got free pizza for lunch! I capped the day off by making three batches of strawberry jam. I did it once the kids were in bed. It was a bit of a late night, but it is much easier to do canning when they are not underfoot.

fresh Ontario strawberries getting ready to become jam

I made jam for the first time last year. It was so nice to have jars ready as gifts, and we didn't have to buy any jam. I had made a years supply! It was so nice in the middle of our cold winter to open up a new jar of jam and get a faint whiff of June. It was so yummy and sweet.
one out of many freshly made jars of strawberry jam
The nice thing about jam is that it is fairly easy to make, yet when you give it so someone they are always impressed. All you have to do is buy the box of pectin and follow the recipe. If you follow it exactly, your jam should work out. I love it when my jam bubbles and gels. I then like using my canning tongs to put my jars in the big canner and then taking them out again. There is no more satisfying sound then the little pop of you lids forming a vacuum seal. Music to my ears.

I think this year I might try my hand at making relish. My mom has the best yellow relish recipe. I usually steal a jar or two of it from her cupboards when we go to visit. I think it is time to stop my thievery and make my own.

While jam and relish may be simple things to make, I get so much pleasure in knowing that I made this for my family and friends. When you put work into something and it helps others, you can't help but feel good. I love seeing my jars lined up and I think to myself wow, look what I accomplished today. Creating, whether it is preserves, or knitted dishclothes, or bread, or a tidy room, makes you feel great. It is nice to create and look on your works and feel a sense of happiness and accomplishment.

What are you going to create today, this week, this month, this year? Are there any canning foods that you enjoy making?